Ten Steps to Hitting the Gold
A brief guide for participants on the beginner’s course. A pdf version of this page is available here.
Introduction
This guide is intended to give a fairly simple introduction to the basic mechanics of shooting a recurve bow. It is not a comprehensive guide but a brief description of the more important principles to get you started along the right lines.
Shooting an arrow should be a smooth and fluid action but to explain the various aspects it is here broken down into ten steps. However, as you progress you will find you are able to blend the steps together. In particular steps 5 onwards covering the draw to full draw, the release and follow through should be one smooth action with just a short pause at full draw as you come to the correct reference point, aim and release. Don’t rush your shots though; it’s not a race.
As you progress you will find that your arrows end up closer to each other on the target. A nice tight group shows you are shooting consistently, even if it is not on the gold. Once you are grouping well, your group can be moved onto the gold by adjusting the sight.
Archery is a fun sport and we hope these notes will help to make your introduction to it more enjoyable.
Safety Safety
- The Field Captain is responsible for everyone’s safety and must be obeyed.
- Running is not allowed on the archery field.
- No archer may put an arrow into a bow until the field captain has blown one short whistle and the archer is standing on the shooting line in the approved manner (see step 1).
- No archer or bystander may go beyond the shooting line while shooting is in progress, even to retrieve a dropped arrow – tell your coach instead.
- If anyone calls ‘FAST’ archers must immediately lower their bows and remove any arrows. It will be because someone is in front of the shooting line.
- When the field captain blows 3 short whistles archers may walk to the targets to retrieve arrows taking care to pick up any that have fallen short.
- No more than 2 archers may remove arrows from a boss, one working from each side towards the middle and ensuring that no-one is standing behind the arrows.
- Juniors aged 12 or under may not pull arrows from a boss on the beginners course.
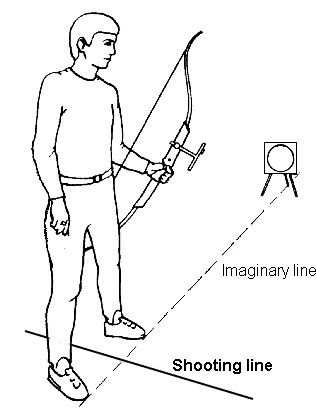
Step 1: Stance
 |
- Stand with one foot either side of the shooting line, about a shoulder’s width apart.
- Your toes should be against an imaginary line that extends towards the centre of the target.
- Relax!
|
Step 2: Finger Placement
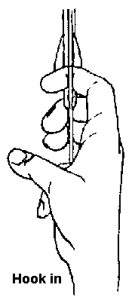 |
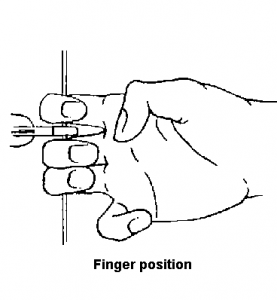
- Clip the nock of the arrow onto the string between the two nock locators so that the odd coloured fletching is horizontal and pointing towards you.
- Place your fingers so that your index finger is above the nock and the next two fingers are below it.
- Hook the string into the finger joints. A deep hook is much easier than trying to hold the string on your fingertips.
- Try not to grip the arrow between your fingers.
|
 |
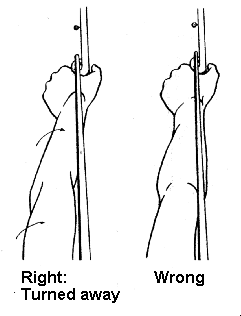
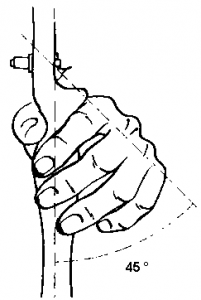
Step 3: Hand Placement
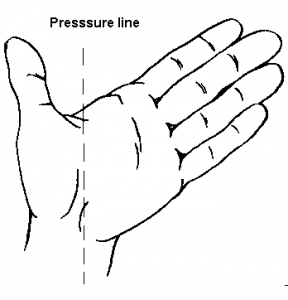 |
- Your hand should be placed so that when you draw the arrow the bow handle presses against your hand along the pressure line shown in the diagram. It must not be pressing against your thumb.
- Relax your fingers. The back of your hand should make an angle of about 45 degrees with the bow.
- Try not to grip the bow. Instead just curl your fingers enough to stop the bow falling out of your hand after you release the arrow. Gripping the bow makes it twist as you release and spoils your aim.
|
 |
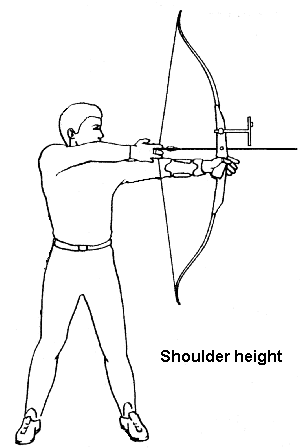
Step 4: The Pre-Draw
 |
- Make sure you are standing straight and tall with your weight evenly on both feet. Turn your head towards the target and focus on the gold.
- Raise your bow arm to about shoulder height so that with your right eye (or left if you are left-handed) you can roughly line up the sight and string with the centre of the target.
- Rotate the elbow of your bow arm (not the bow!) so that it is not in line with the string. This is particularly important if the string is tending to hit your arm.
|
 |
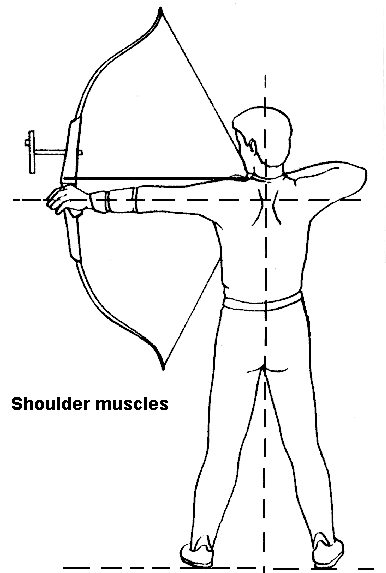
Step 5: Drawing the Bow
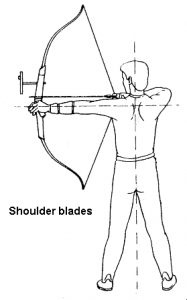 |
- Draw the string back in a straight line towards the reference point (see Step 6) just below your chin.
- Draw with your back muscles, moving your shoulder blades towards each other.
- Keep both shoulders as low as possible.
- Keep your drawing elbow up. During the draw it should be at or just above shoulder height.
|
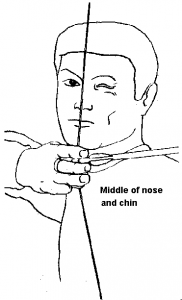
Step 6: Reference Point
- At full draw the string should touch the middle of your chin (and possibly the tip of your nose).
- Your index finger should touch just under your chin.
- Keep your teeth together.
- Keep your head upright.
- This position is very important as any variation will affect the accuracy of your shots.
|
 |
Step 7: Full Draw
 |
- Keep your back muscles under tension
- Keep both shoulders low
- Your bow hand, draw hand and back elbow should form a straight line.
|
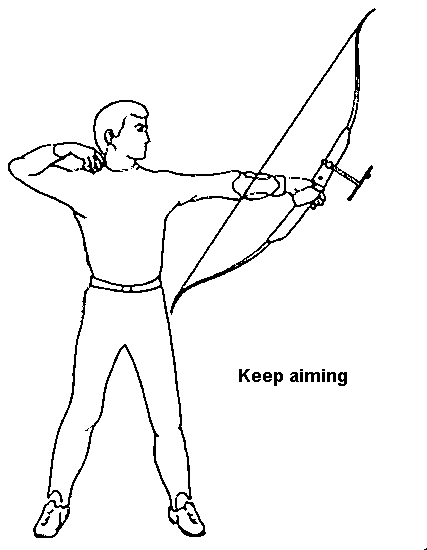
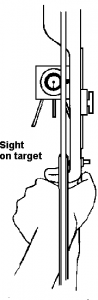
Step 8: Aiming
- Aim using your right eye (left eye if you are shooting left-handed) – close the other eye.
- Focus on the target, not the sight pin, and keep looking at the centre of the gold.
- Keep the sight pin in the centre of the gold.
- The string should be a blur just between the sight pin and the edge of the bow.
|
 |
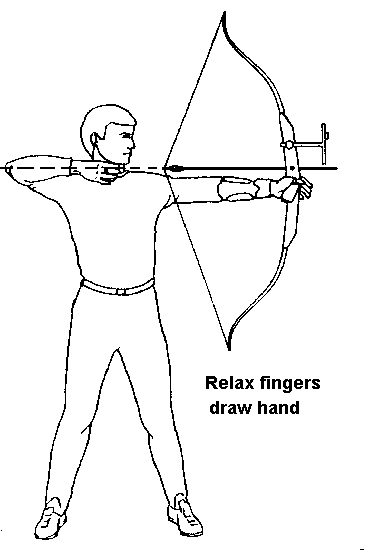
Step 9: Release
- Keep pulling your shoulder blades towards each other, while relaxing the fingers of your draw hand.
- As you release the arrow your back muscles continue to pull and your draw hand will automatically move backwards.
|
 |
Step 10: Follow Through
 |
- After the release your draw hand should be relaxed and near or behind your ear.
- Do not let your bow arm drop or move sideways – keep aiming towards the gold until the arrow hits the target.
|